

Shaders are mods that enhance Minecraft’s graphics by adding effects like dynamic lighting, realistic water, waving grass, and better shadows. They make your game look like a cinematic masterpiece! I remember the first time I loaded a shader pack my jaw dropped seeing the sunlight filter through leaves and reflect off water. It’s like Minecraft went from pixel art to a painting.
Shaders work differently for Java Edition and Bedrock Edition, so I’ll cover both. Java Edition uses mods like OptiFine or Iris, while Bedrock Edition relies on render packs or third-party apps. Don’t worry if that sounds complicated I’ll break it down step-by-step.
Table of Contents
Requirements for Installing Shaders
Before we jump into the steps, let’s talk about what you need. For Java Edition, you’ll need a computer with decent specs think at least 4GB of RAM and a graphics card that supports OpenGL 4.0. Bedrock Edition works on consoles, phones, or PCs, but shaders are trickier there and might need specific apps.
| Requirement | Java Edition | Bedrock Edition |
|---|---|---|
| Platform | PC (Windows, Mac, Linux) | PC, Console, Mobile |
| Mod/App Needed | OptiFine or Iris | Render Dragon or Third-Party Apps |
| Minimum RAM | 4GB (8GB recommended) | 2GB (4GB recommended) |
| Graphics Support | OpenGL 4.0 or higher | Varies by device |
| Internet | Needed for downloads | Needed for downloads |
How To Install OptiFine
To use shaders in Minecraft Java Edition, you need a mod like OptiFine or Iris. I prefer OptiFine because it’s super reliable and boosts performance too. When I first tried installing shaders, I was nervous about mods, but OptiFine made it so easy. Here’s how to do it
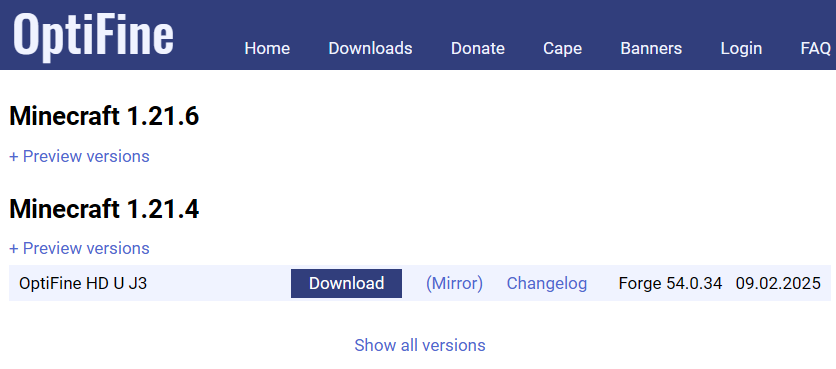
Visit official OptiFine website (optifine.net). Make sure you’re downloading from the legit site there are sketchy ones out there! Choose the version that matches your Minecraft game version. For example, if you’re playing Minecraft 1.21 in 2025, pick the OptiFine version for 1.21. Click the download link, and you might see a preview page don’t worry, just click “Download” again.
Once the file downloads (it’s a .jar file), double-click it to run the installer. If it doesn’t open, make sure you have Java installed on your computer (java.com has it for free). The installer will ask you to select your Minecraft folder usually, it finds it automatically. Hit “Install,” and OptiFine will add a new profile to your Minecraft launcher.
Now, open the Minecraft launcher, select the OptiFine profile, and launch the game to make sure it works. I always test it without shaders first to avoid crashes. If everything looks good, you’re ready for the next step. This process took me about 5 minutes, and it’s smooth once you get the hang of it.
Tip
Optifine will quickly install if you have Java on your computer. You can download Java for Windows from here.
How To Install Iris Shaders

To install Iris Shaders for Minecraft, first download the Iris installer from a reliable source like the official Iris website or Modrinth. Run the installer, select your Minecraft version (ensure you’ve played it once), and click “Install”. Launch Minecraft with the new Iris profile, then navigate to “Options,” “Video Settings,” and “Shader Packs”.
Download your chosen shader packs (usually .zip files) and place them in the “shaderspacks” folder by clicking “Open Shader Pack Folder”. Finally, in Minecraft’s Shader Packs menu, select your desired shader pack and click “Apply” to enable it. You can then customize settings via the “Shader Settings” button. Note that Iris generally works best with Sodium for performance and is Fabric-compatible, not Forge. Ensure your system meets basic hardware requirements for optimal shader performance.
Note
Iris Require Sodium mod to be installed in game, make sure to have the right version!
How to Download Shaders?
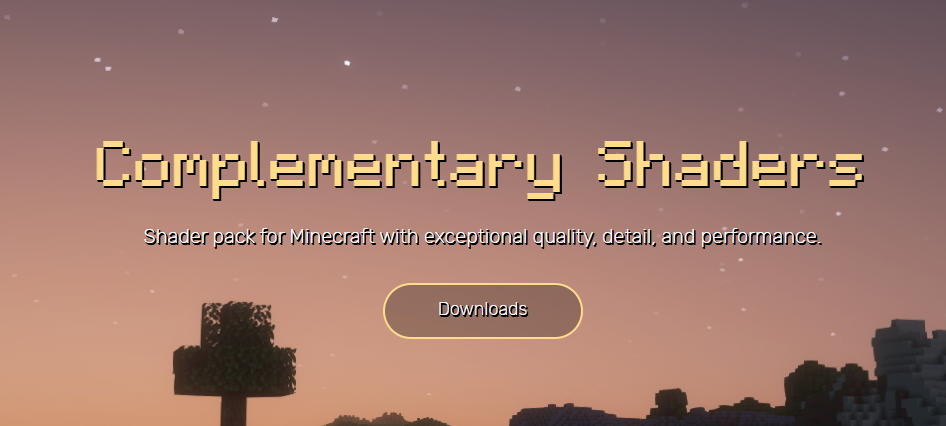
Now that OptiFine is installed, you need a shader pack. There are tons of options, like SEUS, BSL, or Complementary Shaders, which are super popular in 2025. I love BSL Shaders because they balance beauty and performance, but you can choose one that fits your PC’s power.
Go to a trusted site like curseforge.com or modrinth.com to download shaders. Search for “Minecraft shaders 2025” to find the latest packs. For example, I downloaded BSL Shaders from CurseForge. Click the download button, and you’ll get a .zip file don’t unzip it! Save it somewhere easy to find, like your desktop.
Before you move on, check if the shader pack matches your Minecraft version. I once tried using an outdated shader pack, and it crashed my game. If you’re unsure, sites like CurseForge list the compatible versions. Also, some shaders need a beefy PC, so if your computer’s older, go for lightweight ones like Sildur’s Vibrant Shaders. This step is exciting because you’re so close to seeing those epic visuals!
Adding the Shader Pack to Minecraft Java Edition
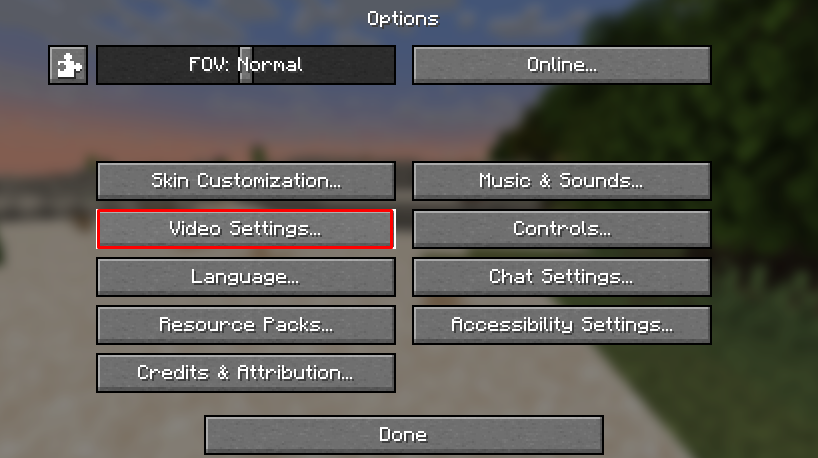
This step is where the magic happens! With OptiFine installed and your shader pack downloaded, it’s time to add it to Minecraft. Open the game with your OptiFine profile, then go to “Options” > “Video Settings” > “Shaders.” You’ll see a “Shaders Folder” button click it, and a folder will pop up.
Drag your downloaded shader pack (.zip file) into this folder. Don’t extract it; Minecraft needs the .zip as is. Back in the game, you should see the shader pack listed in the Shaders menu. Click it to activate, and hit “Done.” The game might lag for a second while it loads mine did the first time, but it was worth it!
How to Install Shaders in Minecraft Bedrock Edition
Bedrock Edition is a bit trickier because it doesn’t support mods like OptiFine. Instead, shaders come as resource packs or through third-party apps. I’ve tried shaders on my Xbox and phone, and while it’s not as simple as Java, the results are still amazing. Here’s how to do it on Bedrock:
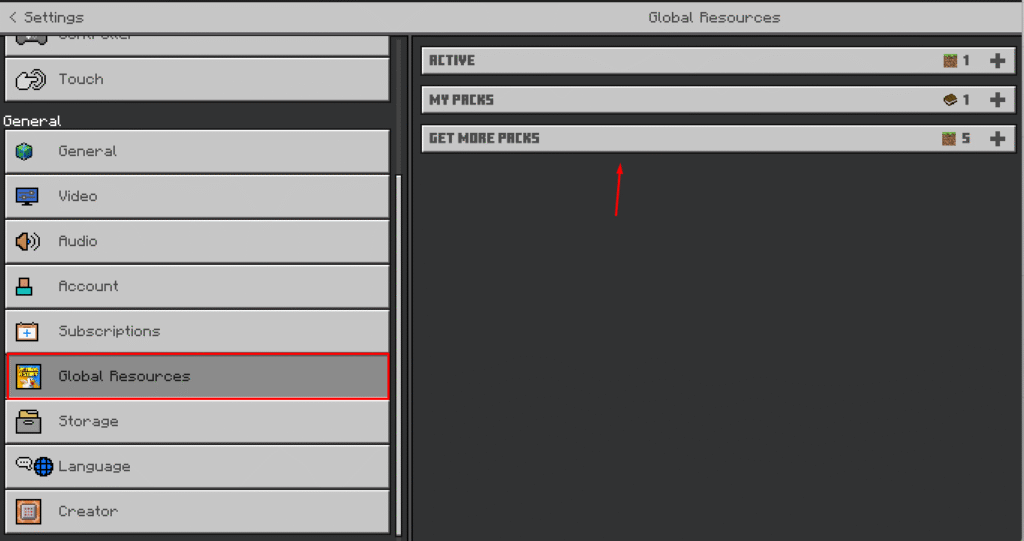
For Bedrock on Windows 10/11, you can use resource packs like “ESBE 2G” or “Harrington Shader.” Search for “Minecraft Bedrock shaders 2025” on sites like mcpedl.com, which is super popular right now. Download a shader pack (it’ll be a .mcpack file). Double-click the file, and Minecraft should automatically import it. If it doesn’t, open Minecraft, go to “Settings” > “Global Resources,” and activate the pack.
On consoles or mobile, it’s tougher because Bedrock’s Render Dragon engine limits shader support. You might need third-party apps like MCPE Addons on mobile. I used MCPE Addons on my phone, and it let me import shader packs easily. Just follow the app’s instructions to download and apply the pack. Be warned: some devices might lag, so test lightweight shaders first.
Optimizing and Testing Your Shaders
Once your shaders are installed, it’s time to tweak and test. For Java Edition, go to “Video Settings” > “Shaders” and click “Shader Options.” You can adjust settings like shadow quality or water effects. I spent hours tweaking BSL Shaders to make my game lag-free without losing the visuals.
For Bedrock, check the resource pack settings in the game. If it’s laggy, try lowering render distance or turning off fancy graphics options. I had to do this on my old laptop to get smooth performance. Test your shaders in a creative world first to avoid messing up your survival builds.
Tips for the Best Shader Experience
- Update regularly: Check for shader pack updates in 2025 to ensure compatibility.
- Backup your worlds: Shaders can sometimes cause crashes, so save your worlds.
- Use lightweight shaders: If your PC struggles, try Sildur’s or Chocapic13’s shaders.
- Adjust settings: Lower render distance or disable particles for better performance.
- Explore new packs: Search “best Minecraft shaders 2025” for the latest trending options.
Summary
Installing shaders in Minecraft Java and Bedrock Editions is a game-changer. Java Edition is straightforward with OptiFine, while Bedrock requires resource packs or apps, but both are worth the effort. My first time seeing shaders felt like stepping into a new game the lighting and reflections blew me away.
Recommended Posts
- Vanilla Refresh Datapack 1.18 → 1.21.9
- Terralith Datapack 1.18.2 → 1.21.8
- Dungeons and Taverns Datapack 1.19 → 1.21.10
- Geophilic Datapack 1.19 → 1.21.9
- Luki’s Grand Capitals Datapack 1.19 → 1.21.8
- How to use Rewind MOD on Lunar Client | Minecraft
- Turning Viewer Ideas into Minecraft Plugins
- Zalith Launcher – Minecraft Java on Your Android Phone
- How to Use Simple Voice Chat Mod in Minecraft
- 10 Cool Minecraft Mods (Fabric) | Part 2
Bro is this work in normal minecraft bedrock edition
No this step is only for java edition, I’ll post tutorial for bedrock too